

In December, I was adding very necessary pins to my “Excuse for a Dinner Party” board, and happened upon the most amazing project: the dinosaur serving plate. A good friend of mine loves dinosaurs. I mean, loves them. Loves them so much she and her husband used them as center pieces at their wedding, loves them. So when I saw this project, I had the perfect Christmas present aligned.
A big thank you to the Hostess with the Mostess who carefully wrote out instructions for this dino serving dish, but unfortunately, it took so much longer than I could have ever anticipated. The biggest issue was using a handheld saw to (earmuffs, kids) decapitate the dino. No matter how well you measure, there’s bound to be some uneven cutting. I would strongly recommend bringing over some baked goods to a friend who has a table saw and using that over a hand held. The added baking effort is definitely worth it.
A few worthy tips:
- Choose a dinosaur model that has substantial material (no flimsy plastic!) Whether you are using a plastic or ceramic plate (as I did), it’s important to have a stable base. I’d recommend a dinosaur that is at least 6-10″ tall, and using a side salad plate. Mine was purchased from the Dollar store for, well, you know how much, and it was great.
- If you do happen to misalign your cutting, make sure to have a heavy duty nail file, or better yet some sandpaper to even out the edges. This will make gluing much, much easier and keep your sanity in tact.
- The original instructions call for parchment paper to line the plate before spray painting, but I painted the body separately, then glued it to the plate. I would strongly recommend using a pencil or paint brush to hold the head while spray painting. You’ll keep your hands paint-free and see better coverage on the dino.
- Make sure to paint the dinosaur at least 3 separate times to ensure proper coverage. I think mine could have used one more round, but it still looks pretty darn good.
- The Krazy Glue I used was awesome for securing the dino to the plate, but my saving grace was the bathroom caulking used to fill the gaps between the body and plate. (Yes, I caulked a dinosaur.)
I had intended for this serving dish to be used for a cookie or candy display, but my friend opted for a jewelry dish, which I may love even more. Glad you’re enjoying your new dino buddy, Kat!
Updated 3 March 2014: I’m pleased to share a photo of the fabulous dinosaur serving dish in action! Don’t you wish you had one?
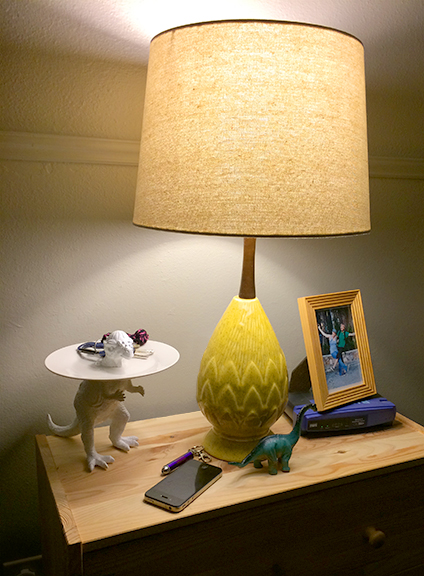
Perfectly placed in the home (alongside its brontosaurus brother).

First, HUGE congrats on your Pinterest victory!! I have more epic fails than I care to admit. 🤦🏻♀️
I’m want to make this for my god son’s birthday party. I’m having trouble finding a Dino that’s big enough. Do you by chance remember how big/what size Dino you used????
Thanks!!
LikeLike
Thanks, Ashley! I’ll admit it was a challenge finding a Dino large and heavy enough to get the job done. I would recommend one that’s about 8-10” tall, and I also filling the hollow center with rocks to help stabilize it. I think I ended up finding one the right size at a toy store. Good luck!!
LikeLike